Over the course of the pandemic, and really working from home, I assume that we have all had to find new and interesting ways to spend our time. I would hope that everyone went out and learned something new, but who knows? I decided to learn about something that has held a bit of interest of me for a little while: leatherworking. Okay, that maybe sounds nuts, but as a single person with no one to spend my time with, I realized that I need to do something other than just sit in front of the computer or sit in front of the tv. I have to do something that gets me away from my screens.
So I started watching youtube videos on leatherwork and found them all very interesting. I found a facebook group called, “Chuck Dorsett Fan Club” that had a monthly leather challenge. I tried a couple of the challenges. They were all tooling challenges. Tooling leather is when you carve/hammer designs into the leather. If you watch a lot of videos, there are some very talented people out there. I am not one of them.
I have been collecting some leather patterns over the last couple of years. I have just been saving them to my computer. Sometimes I would print them out, but ultimately, I wouldn’t do anything with them. I was being anxious about trying to sew leather. With Halloween approaching, I just said screw it, and started working on this leather skull project. But two or three days into it, at work, they decided to do this “carved pumpkin” challenge and I thought, I am pretty sure I have a jack-o-lantern pattern. So I proceeded to carve my pumpkin out of leather.
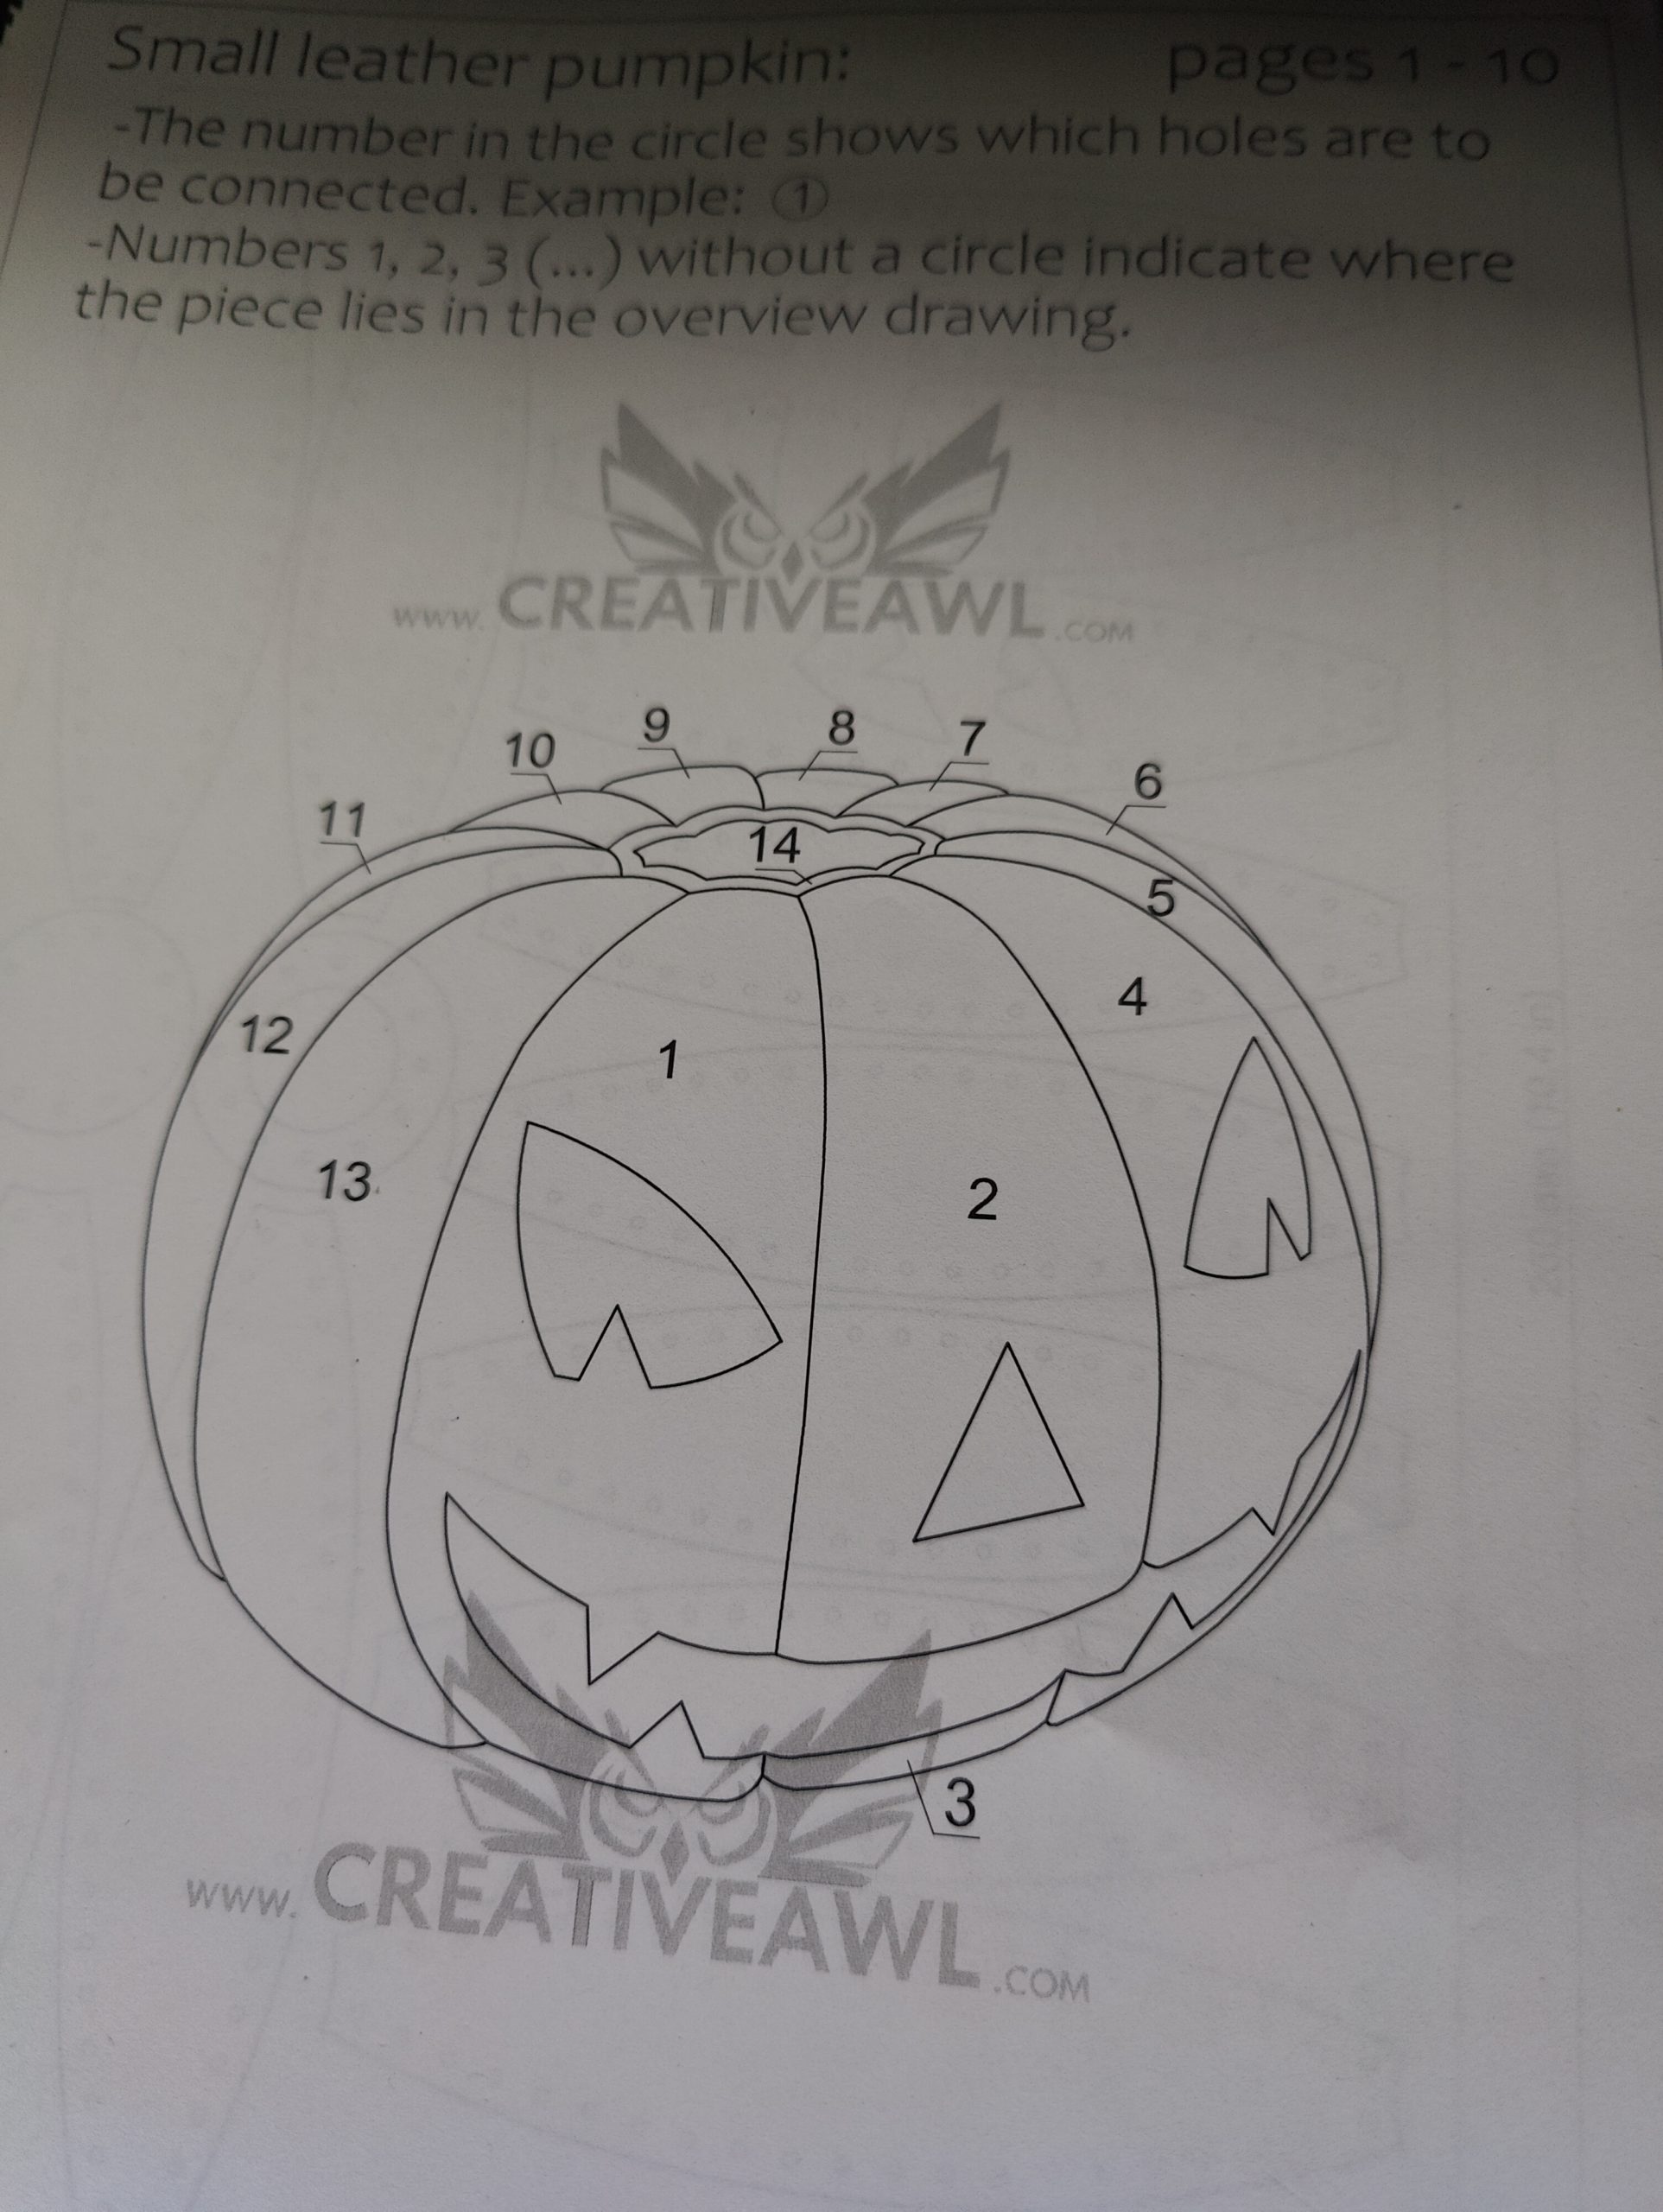
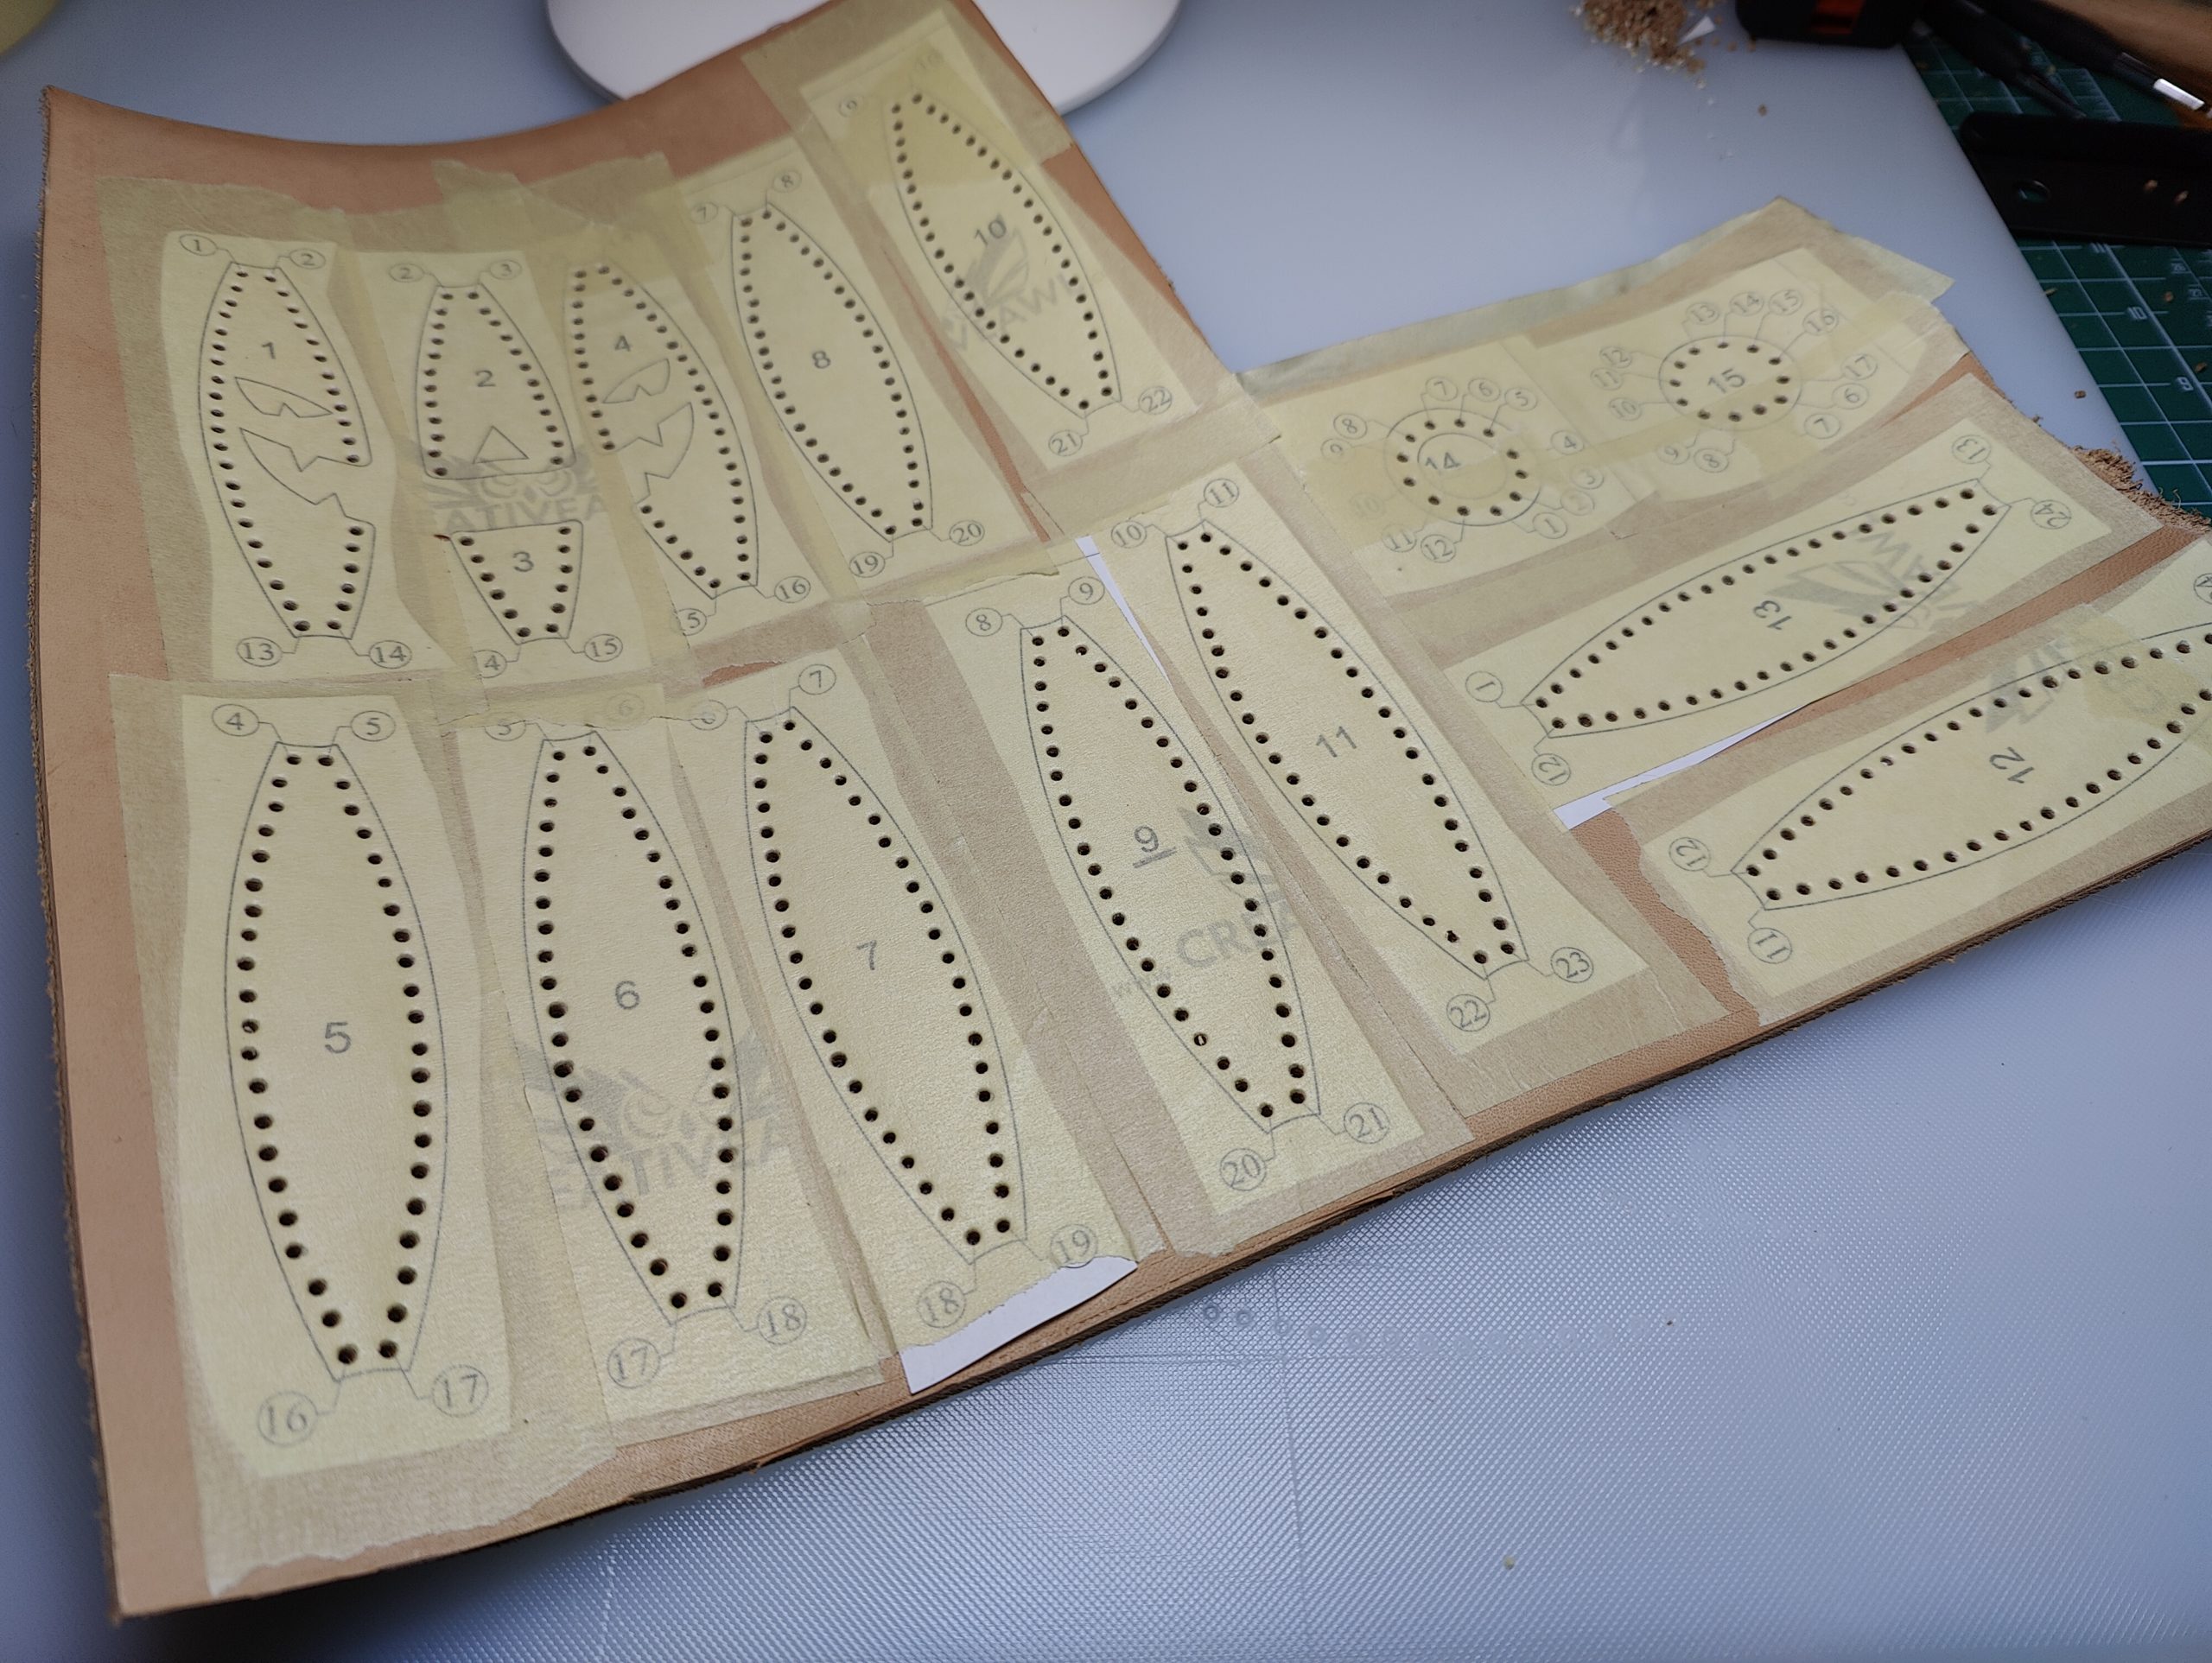
Here it is, the Creative Awl Jack-o-lantern pattern. It looks like a happy thing. The first thing I did was print out the pattern onto A4 paper. A4 is different than the letter size paper we use here in the US. Letter size paper is 8.5″ X 11″. A4 is 8.25″ X 11.75″. Luckily it still fits in the printer. It seems like all the leather pattern shops use this size. Maybe it is a European thing? I don’t know. Anyway, I printed it out and taped it to the leather and then started punching out all the holes. That is what they do in the youtube videos. The order of operations is:
- Print it out
- Tape it to the leather
- Punch all the holes
- Cut out the design
- Stitch it back together
Then of course came the part I was dreading. I have watched so many videos on how to do the proper saddle stitch. Of course, not everyone does it the same way, which really doesn’t help when you are a beginner, lol.
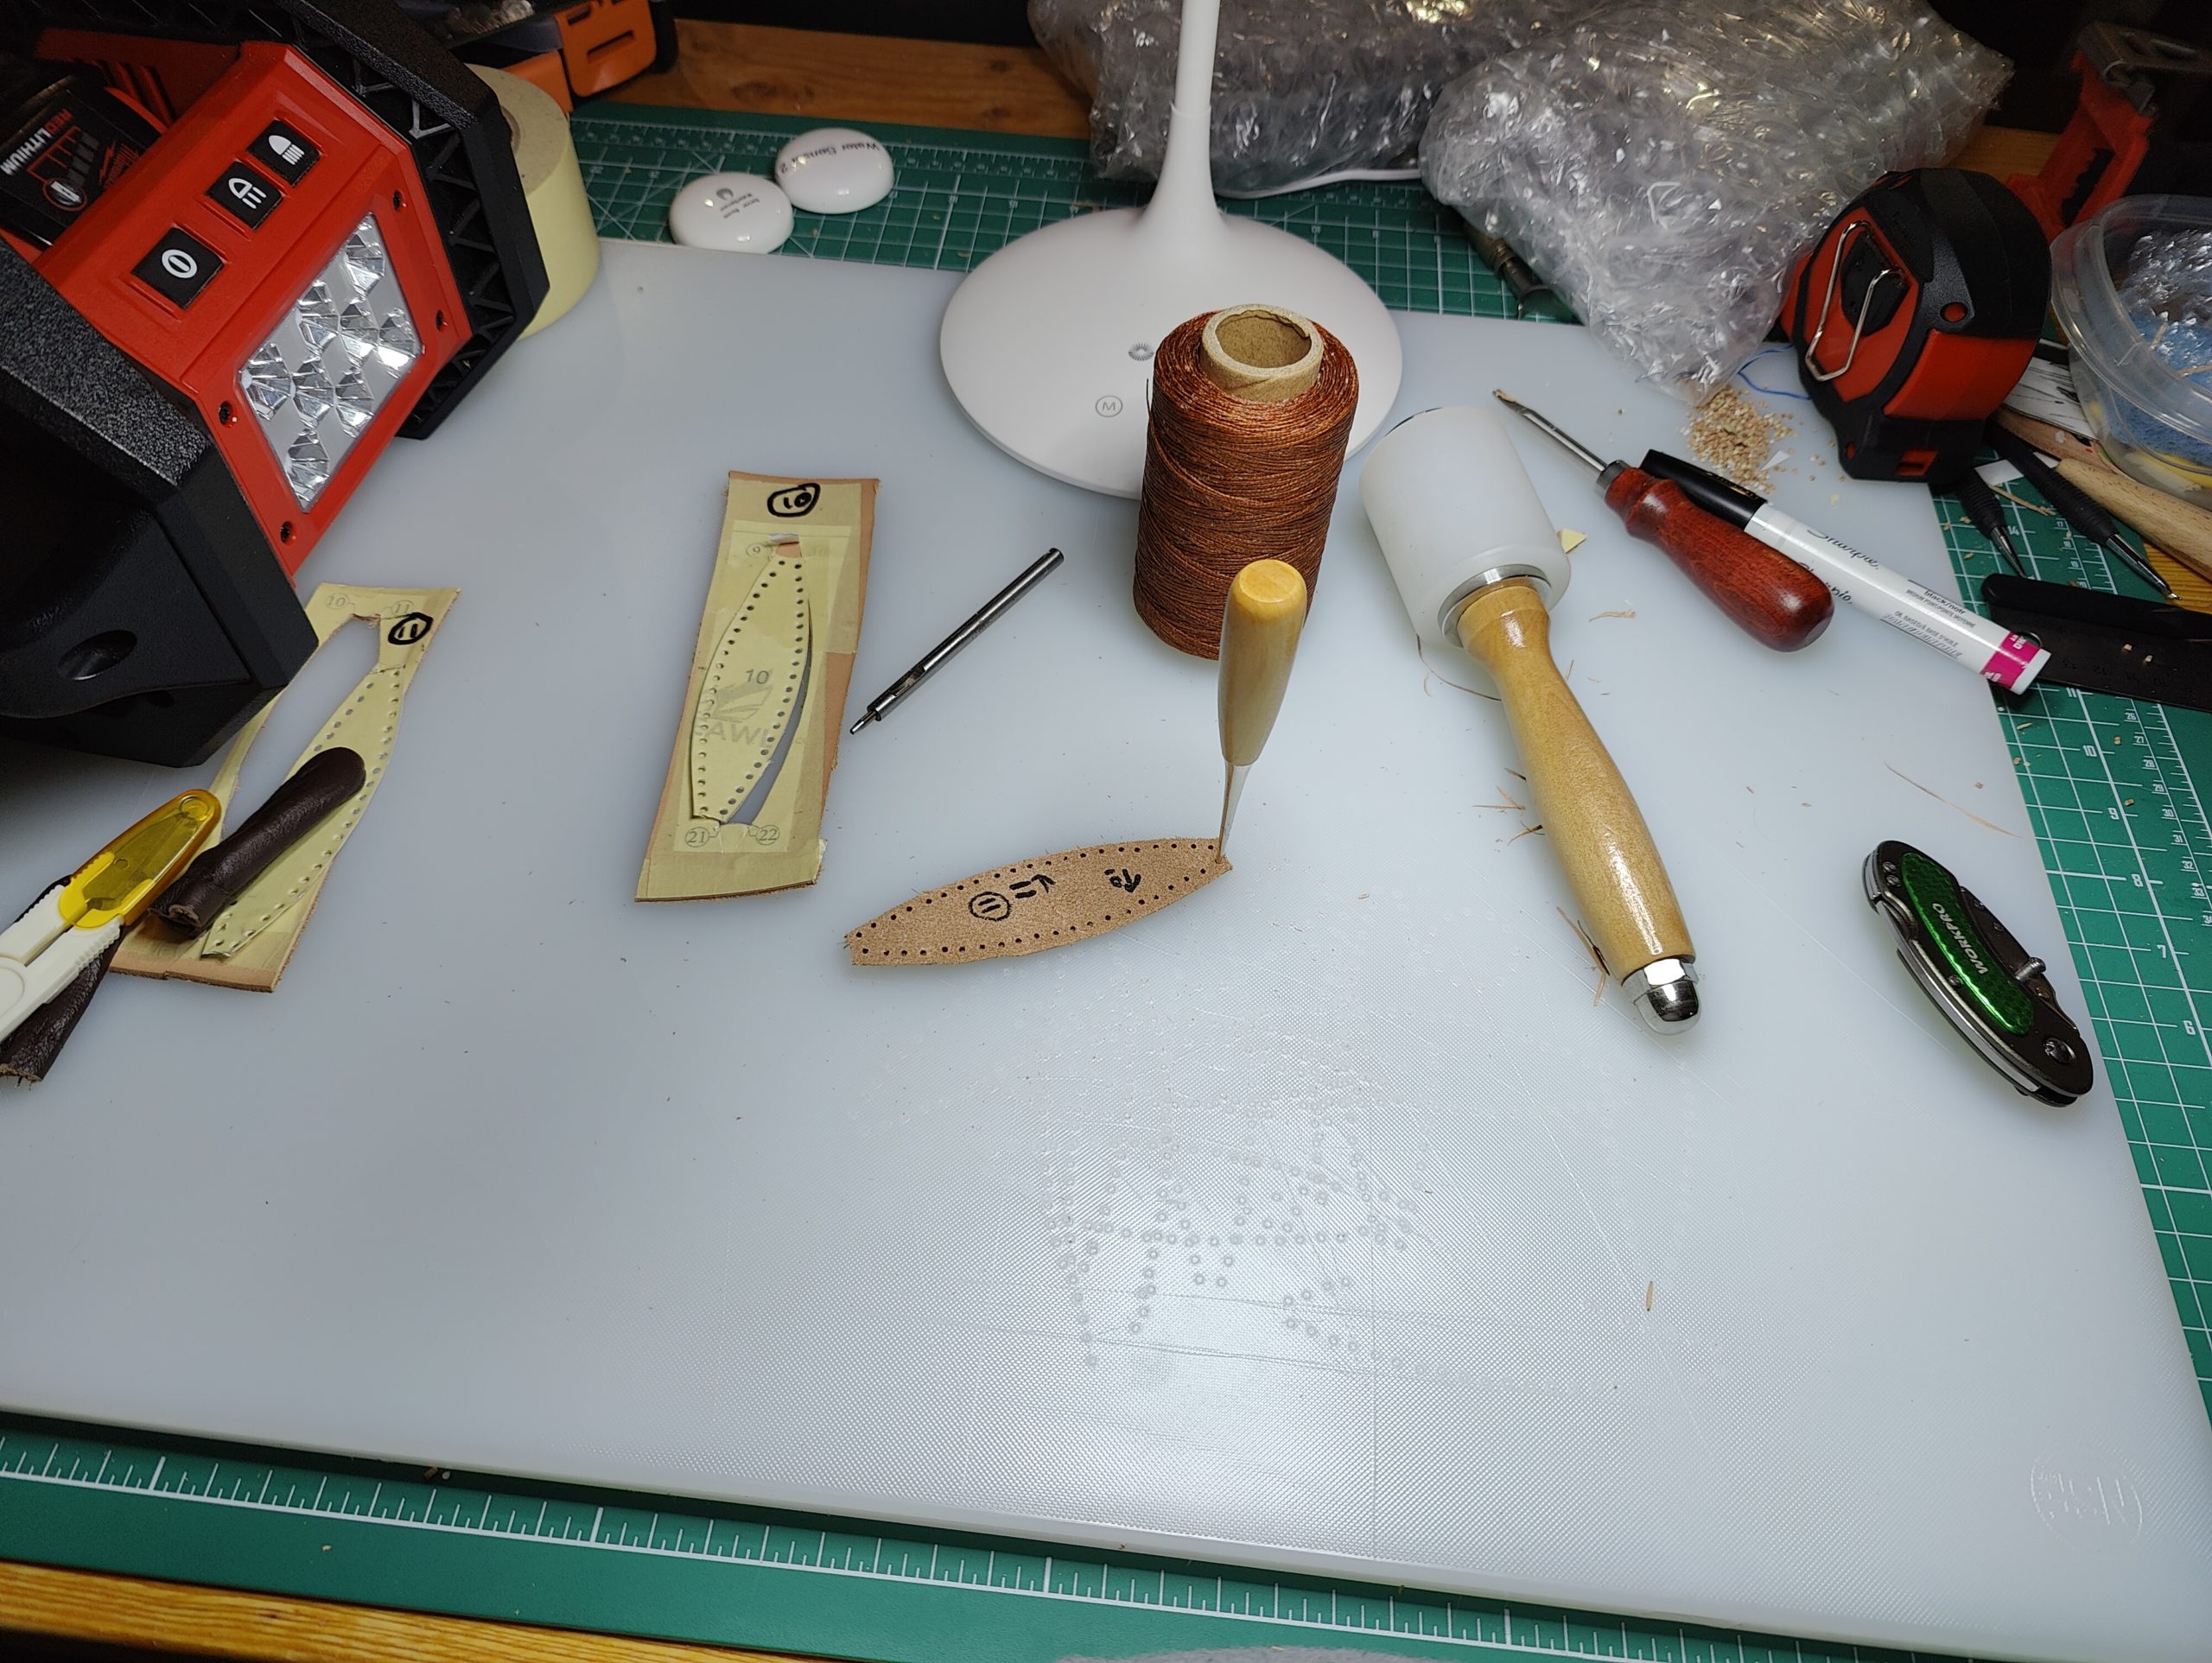
Turns out, I was worried over nothing. It’s not too difficult.
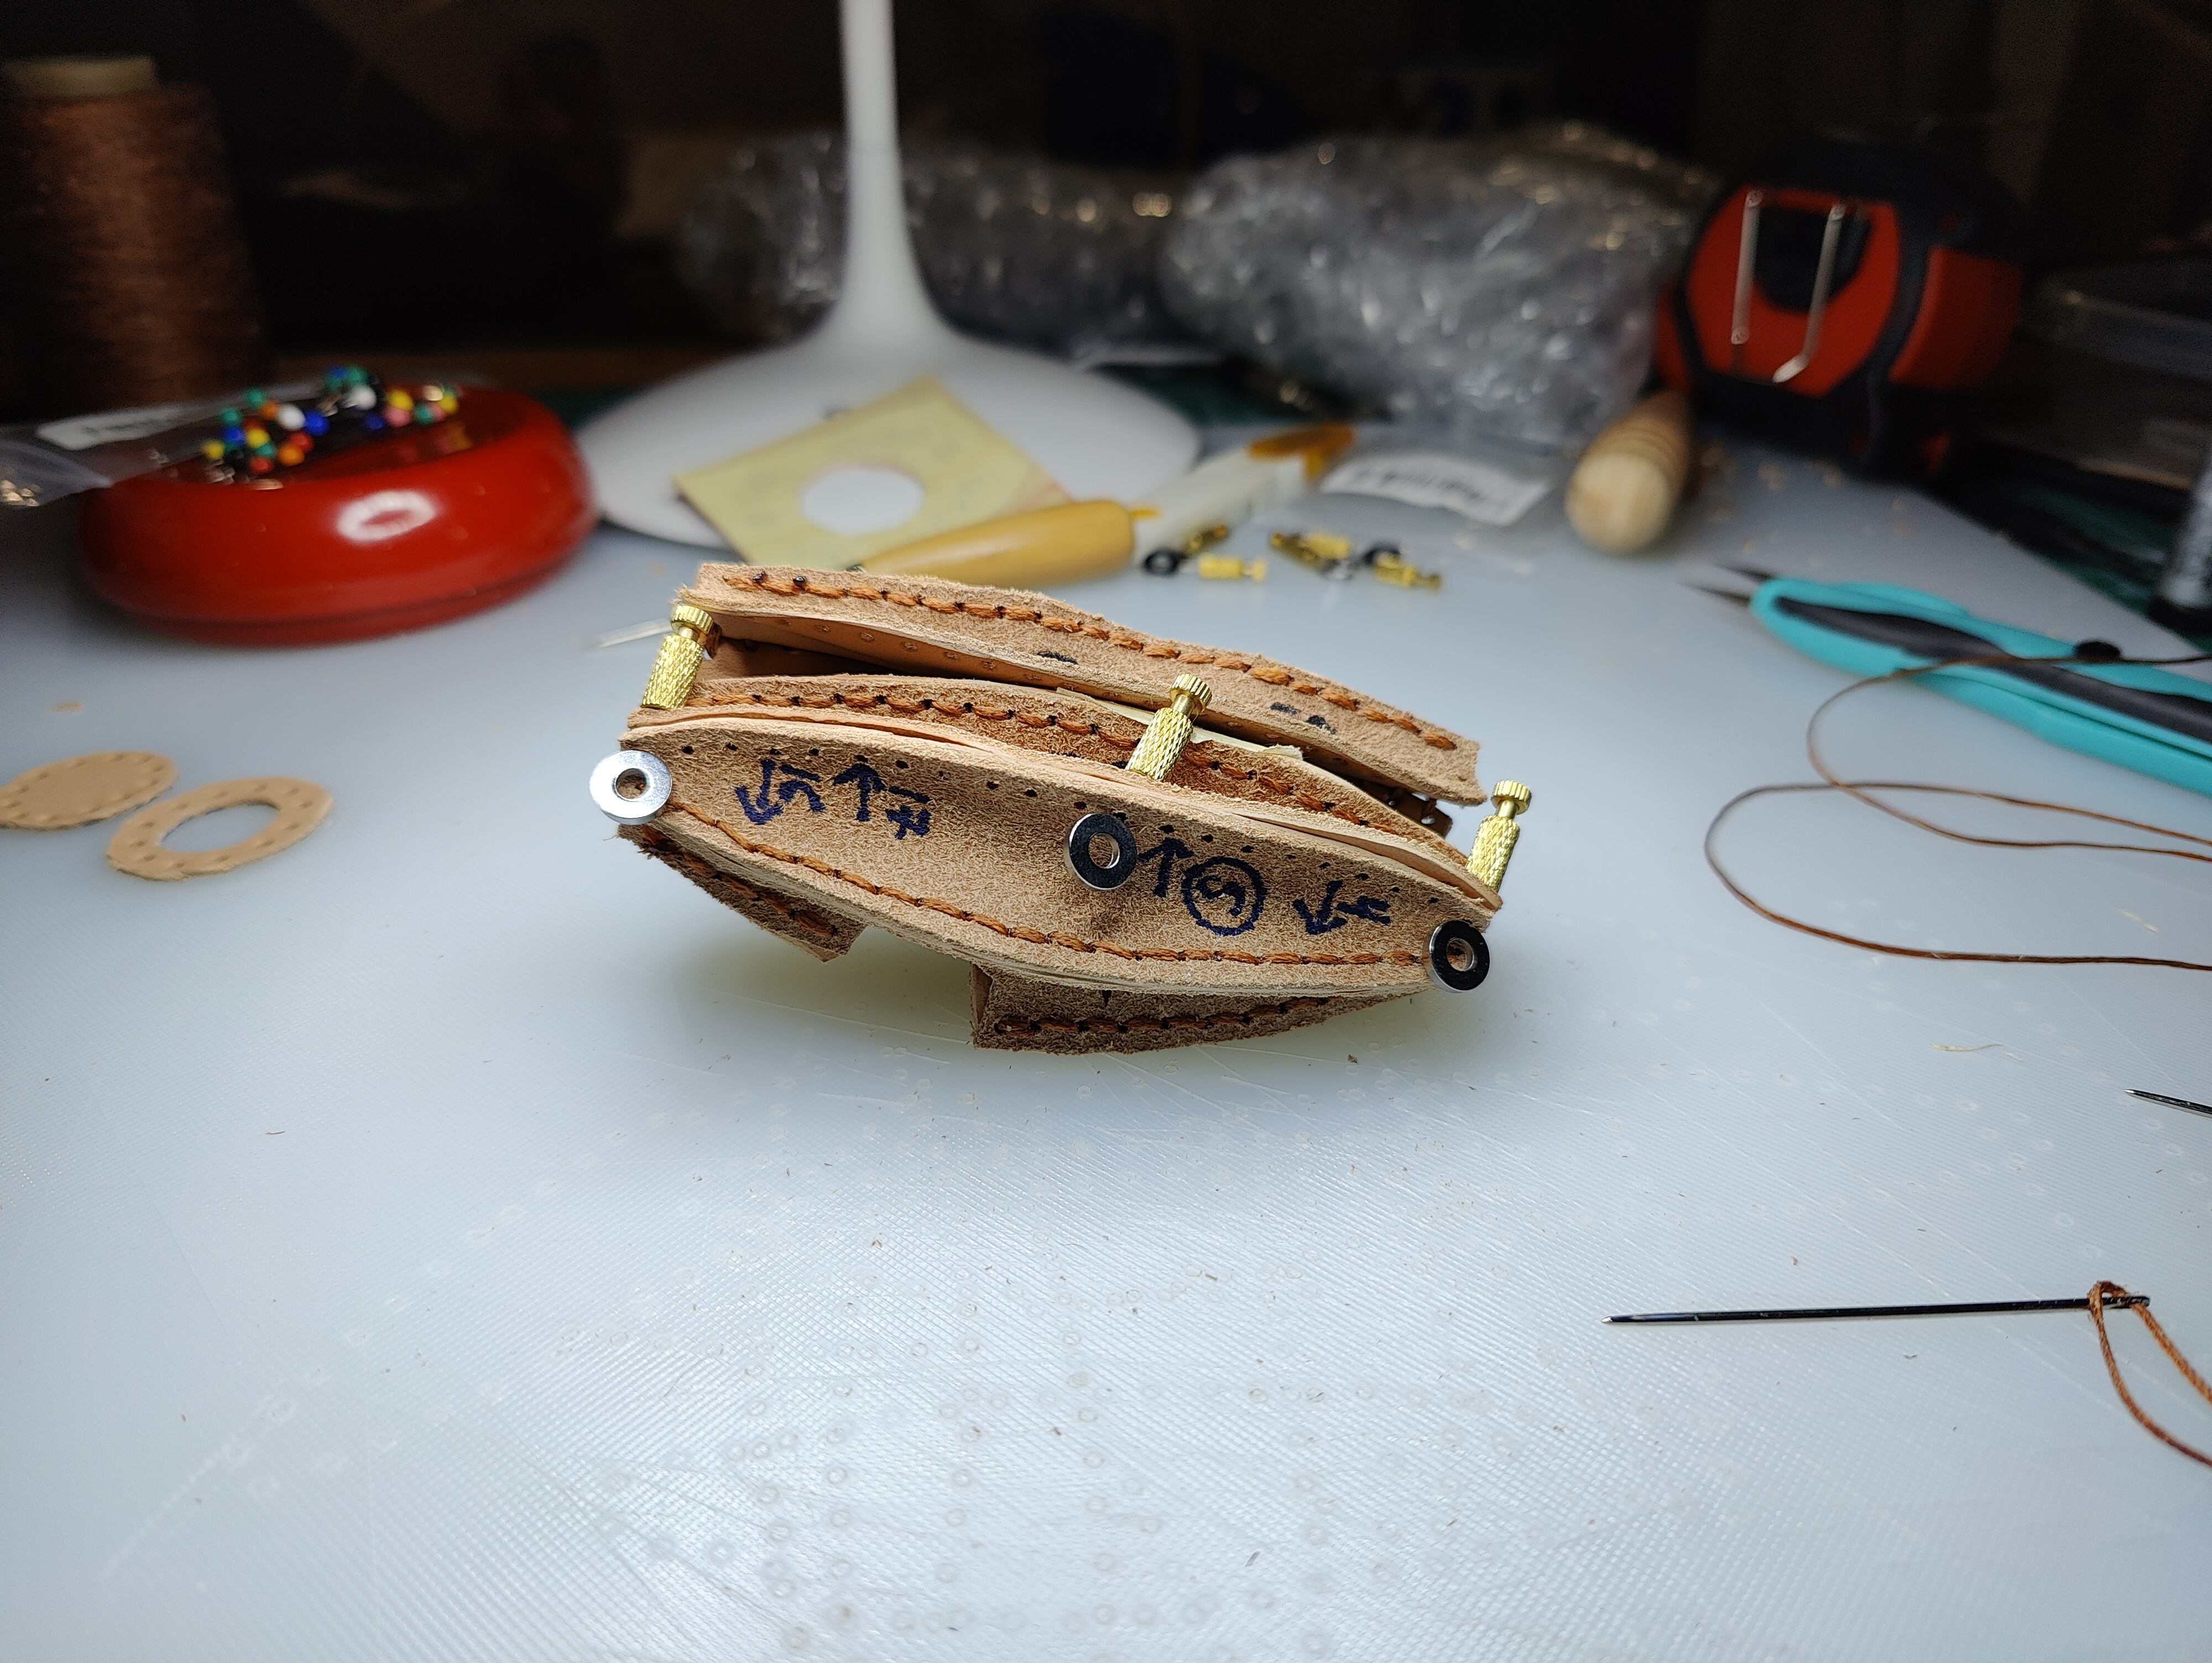
In this picture above, it looks super complicated. The pattern had all these lines on it and called out the holes on the top and the bottom. So I sharpied them on. They weren’t necessary at all. I don’t remember what these little brass-looking things are called, but they help hold the leather together when you are sewing it. Very helpful.
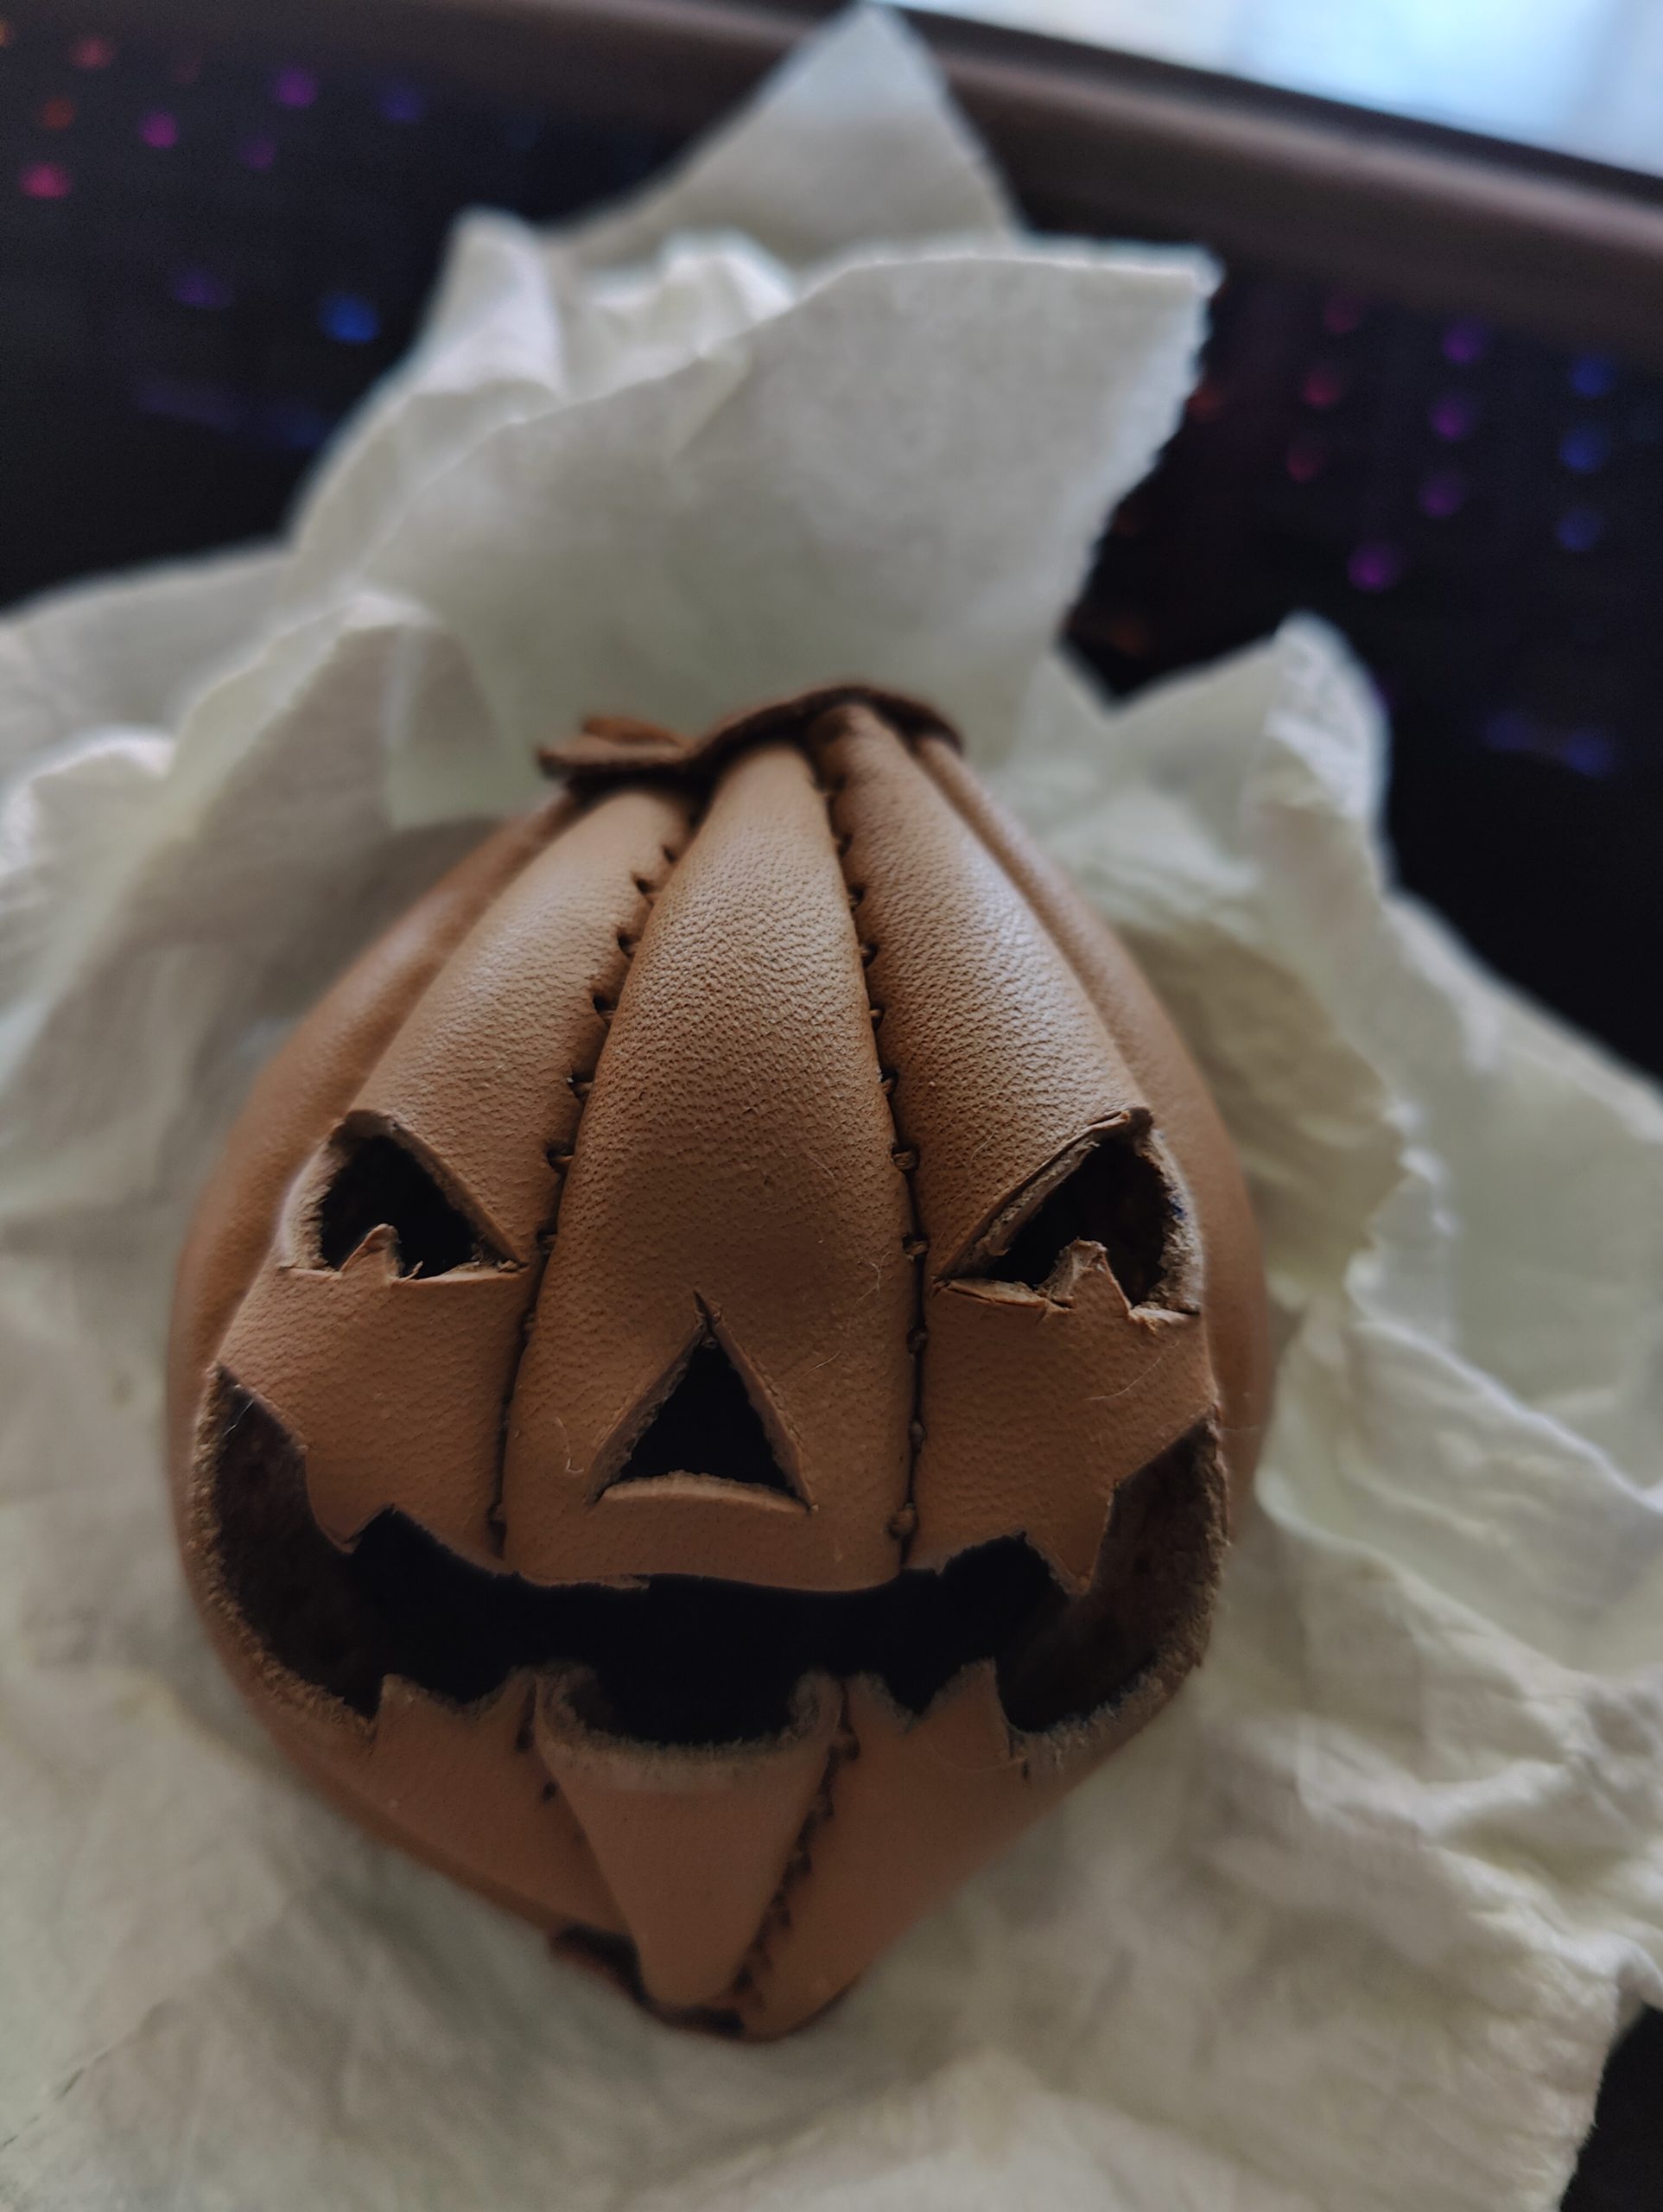
He turned out kind of creepy and not at all happy like in the pattern picture. I still need to dye him to protect the leather. It has been sitting on my desk for the last week and it is super dried out right now. Overall, I really enjoyed this pattern. When I shared it with coworkers some suggested that I should make a big one. Maybe I will…next year. If you decide you want to do this pattern yourself, you can get it here: https://creativeawl.com/shop/halloween-pumpkin-pdf-pattern/
Now that this is done, it’s back to the skull project. Hopefully, I can get it done before Halloween. I will try and remember to post back here if I win the pumpkin carving contest. Cheers! -Josh